

How to Build a Production-Grade Visual Defect Detection System for Manufacturing
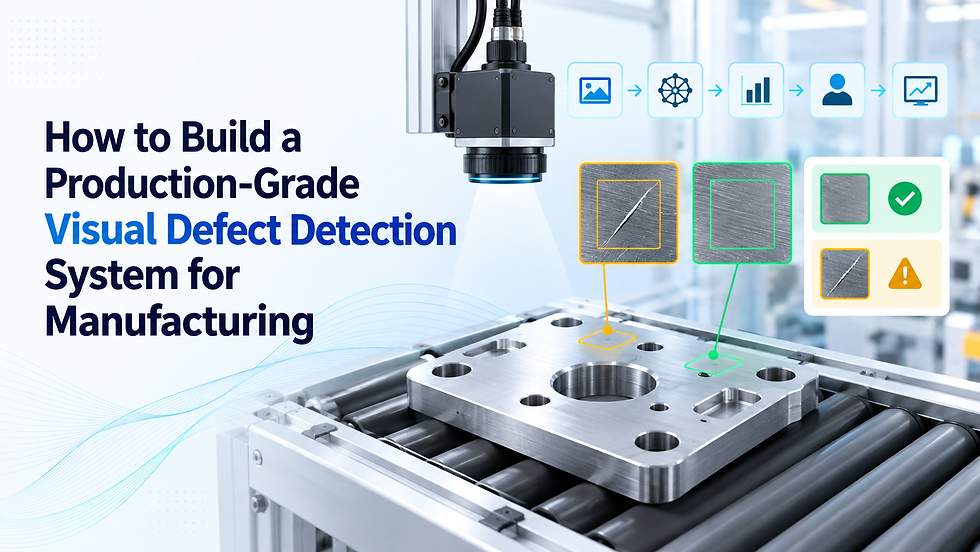
A convincing factory inspection demo is easy to make: train a classifier, upload a product image, and display defective or normal. A production inspection system is harder. It must cope with illumination changes, camera movement, unseen normal variation, uncertain scores, traceability, model drift, and the very different costs of a false reject and a defect escape.
This tutorial builds a small but complete reference implementation. We will generate aligned metal-plate images, learn normal appearance, calibrate separate pass and reject thresholds, localize anomalies, expose the model through FastAPI, test the failure path, and package it in a non-root Docker image. The companion repository is at examples/industrial-visual-defect-detection.
The data are deliberately synthetic so the workflow can run locally. The results in this article show that the pipeline works; they do not claim real-factory accuracy.
Technology stack: Python, NumPy, Pillow, FastAPI, Pydantic, Pytest, Docker, and GitHub Actions.
What we are building
The service receives the identifier of an inspection image and returns:
{
  "sample_id": "test-defect-000",
  "model_version": "normal-appearance-zscore-v1",
  "anomaly_score": 16.638508,
  "decision": "reject",
  "hotspot_fraction": 0.01178,
  "bounding_box": [33, 37, 68, 51]
}
These values come from the verified deterministic tutorial run. The important design choice is the decision policy:
Pass: sufficiently similar to qualified normal data.
Review: uncertain; a trained operator or downstream rule decides.
Reject: clearly anomalous under the calibrated policy
The tutorial does not connect the result to a line-stop or reject actuator. That requires a separate controls and safety design.

Why industrial visual inspection is a strong AI engineering problem
The World Economic Forum reports unusually broad expected AI adoption in advanced manufacturing, while NIST's 2026 smart-manufacturing roadmap identifies AI/ML capabilities, trustworthy integration, validation, and operational deployment as active needs. NIST also maintains manufacturing work on detection and segmentation of defects. These are signals that the opportunity is not only “use a model”; it is to engineer a reliable measurement and decision system around the model. See the WEF industry analysis, NIST smart-manufacturing roadmap, and NIST defect detection research.
For a realistic public benchmark after this tutorial, MVTec AD provides more than 5,000 high-resolution images across 15 object and texture categories, with defect-free training data and anomalous test images plus pixel-level annotations. Read its terms before use: MVTec AD dataset.
Prerequisites
Python 3.11 or newer
Docker Desktop or another Docker engine for the container step
Git
About 500 MB of free space
Clone or copy the companion project, then enter it:
cd examples/industrial-visual-defect-detection
python -m venv .venv
Activate the environment:
.venv\Scripts\Activate.ps1
On macOS or Linux:
source .venv/bin/activate
Install the locked tutorial dependencies:
python -m pip install --requirement requirements-dev.txt
Step 1: Define the inspection contract before the model
Write down the operational contract first:
What part family and surface are in scope?
Which defect families matter—scratches, dents, stains, missing features, contamination?
What is the acceptable false-accept rate for each severity?
Can uncertain parts wait for manual review?
What must happen when the camera, model, or network is unavailable?
These answers determine the data and architecture. A cosmetic inspection can often tolerate review latency. A safety-critical component may require redundant measurements and a conservative fail-safe state.
The sample uses a three-way decision rather than pretending every score is certain. This is a simple form of selective automation: automate high-confidence cases and expose ambiguity.
Step 2: Generate leakage-resistant tutorial data
Run:
python scripts/generate_dataset.py
The script creates 160 images:
Split | Normal | Defective | Purpose |
Train | 60 | 0 | Learn qualified normal appearance |
Calibration | 20 | 20 | Select pass and reject thresholds |
Test | 30 | 30 | Final untouched evaluation |
Scratch, dent, and stain defects receive pixel masks so localization can be measured. In a real project, do not randomly split near-duplicate video frames. Keep production batches, suppliers, shifts, lines, or time windows together; otherwise the test set can leak almost identical conditions from training.
The manifest records every sample and its split:
sample_id,split,label,is_defect,defect_type,image_path,mask_path
train-normal-000,train,normal,0,none,...
cal-defect-000,calibration,defect,1,scratch,...
Step 3: Learn normal appearance
Many factories have abundant normal parts but few representative defects. A normal-only baseline is therefore a useful first approach.
For each aligned training image, the sample code:
Converts it to grayscale and resizes it to 128 × 128.
Standardizes brightness per image.
Computes the mean and standard deviation at each pixel.
Scores a new image using the absolute per-pixel z-score.
Smooths the anomaly map and uses its 99.5th percentile as the image score.
Run training:
python scripts/train.py
The model is intentionally understandable. It is not a replacement for PatchCore, PaDiM, feature-pyramid methods, segmentation networks, or a vision transformer when the production data require them. It gives us a transparent baseline and an end-to-end system to improve.
Step 4: Calibrate pass, review, and reject thresholds
The training set estimates normal appearance; it must not also be the final evaluation set. scripts/train.py scores the separate calibration set and chooses:
a pass threshold from the high end of calibration-normal scores;
a reject threshold by evaluating candidate score cutoffs on calibration normal and defect examples;
the range between them as the manual-review band.
The current deterministic run produced:
pass_threshold   1.462732
reject_threshold 11.524766
pixel_threshold  5.0
In production, select thresholds from business cost and confidence intervals, not F1 alone. A defect escape may cost a field failure; a false reject may cost inspection capacity. Track both and document who approved the operating point.
Step 5: Evaluate decisions and localization
Run:
python scripts/evaluate.py
The verified tutorial run on 60 held-out synthetic images produced:
Metric | Result |
Defect escalation recall | 100.0% |
Auto-pass precision | 100.0% |
Auto-reject precision | 100.0% |
Normal auto-pass rate | 93.33% |
Mean localization IoU | 87.71% |
Decision counts | 28 pass, 2 review, 30 reject |

This is a pipeline smoke test on simple generated data—not a benchmark. Notice what the three-way policy communicates better than accuracy: no generated defect was automatically passed, while two normal cases were safely routed for review.
The anomaly map also lets us compare predicted hotspot pixels with the generated defect mask. In a factory evaluation, localization quality is useful for operator trust and root-cause analysis, but a visually plausible heatmap is not proof that the model learned the right causal feature.

Step 6: Test the normal and failure paths
Run the complete test suite:
python -m pytest
The tests verify:
the review band is non-empty;
a normal demo part passes;
a defective part is escalated and localized;
the held-out evaluation contains no synthetic false accepts;
health, readiness, success, and unknown-sample API behavior.
The unknown-sample test matters. Production services must fail explicitly rather than silently scoring the wrong or missing image.
Step 7: Serve the model through FastAPI
Set the source path and start Uvicorn:
$env:PYTHONPATH="src"
uvicorn factory_vision.api:app --host 0.0.0.0 --port 8080
Then verify readiness:
curl http://localhost:8080/readyz
Expected structure:
{
  "status": "ready",
  "model": "normal-appearance-zscore-v1",
  "demo_samples": 3
}
Inspect a sample:
curl -X POST http://localhost:8080/v1/inspect \
  -H "Content-Type: application/json" \
  -d '{"sample_id":"test-defect-000"}'
Use test-normal-001, test-defect-000, or test-defect-001. The tutorial endpoint intentionally accepts an allow-listed demo ID. A production API would accept an authenticated object reference or image payload, validate size and encoding, enforce timeouts, and retain a traceable content hash.
Step 8: Build a production-conscious container
Train the artifact first, then build:
docker build -t factory-vision:1.0.0 .
docker run --rm -p 8080:8080 factory-vision:1.0.0
The Dockerfile uses a multi-stage Python image, copies a virtual environment into the runtime stage, runs as UID/GID 10001, exposes only port 8080, and includes a health check. In a delivery pipeline, also generate an SBOM, scan dependencies and the image, sign the image, pin it by digest, and promote the same digest across environments.
Step 9: Add CI without retraining on production data
The GitHub Actions workflow performs:
checkout → install → generate tutorial data → train → evaluate → test → docker build
This is suitable for a public reproducible sample. In production, large or sensitive data should stay in governed storage; CI should reference an immutable dataset version and usually validate or package a previously approved model artifact instead of training from mutable operational data on every commit.
Step 10: Design the real factory integration
A production path usually adds the following components:
Image acquisition gate
Validate trigger timing, pose, field of view, blur, saturation, illumination, occlusion, and expected part identity before inference. Route invalid captures to recapture or review; do not treat them as normal.
Traceability
Persist the inspection ID, part or batch ID, image hash, capture configuration, preprocessing version, model version, threshold-policy version, score, decision, latency, and operator disposition.
Human review
Show the original image and bounded anomaly overlay, require a structured reason code, and feed confirmed outcomes into a governed dataset—not directly into an online model.
Monitoring
Monitor input-quality failures, score distributions, review rate, confirmed escapes, false rejects, per-line segments, latency, queue depth, and resource saturation. Drift is an investigation signal, not an automatic retraining command.
Release safety
Shadow new models on live traffic, compare them with the approved version, apply segment-specific acceptance criteria, use canary rollout where the system architecture permits, and keep a tested rollback path. Follow a risk-management framework such as the NIST AI Risk Management Framework.
Common mistakes
Optimizing only overall accuracy
A 99% score can hide rare but costly defect escapes. Report defect-family recall, false-accept rate, false-reject rate, review load, and confidence intervals by production segment.
Training on uncontrolled images
More images do not compensate for unstable optics. Camera, lens, fixture, and illumination are part of the ML system.
Removing the review band to improve throughput
This transfers uncertainty into silent errors. First measure review causes, improve data or acquisition, and change thresholds through an approved process.
Treating a heatmap as an explanation
A hotspot is a diagnostic aid. Validate it against masks, interventions, known confounders, and operator feedback.
Connecting the demo directly to a PLC
Do not use this sample as a safety control. Define fail-safe states and validate the entire controls chain with responsible engineering teams.
Where to take the project next
Replace the synthetic generator with an approved MVTec AD category or a governed plant dataset.
Add image-quality and alignment models.
Compare the baseline with pretrained feature embeddings and a segmentation method.
Add dataset and model registries, signed artifacts, and staged promotion.
Build a reviewer UI and measure reviewer agreement.
Run line-by-line and time-based validation before any operational action.
How Codersarts can help
Codersarts can help manufacturing and product teams scope an inspection use case, design a data-collection study, build computer-vision baselines, establish production evaluation, implement MLOps and monitoring, and provide dedicated AI engineering expertise. The engagement can begin as a feasibility assessment and progress to a governed pilot without presenting a model demo as production readiness.
Contact: contact@codersarts.com
Product | Link | Description |
Codersarts | Coding and mentorship platform | |
Build | Build SaaS, MVPs, and products | |
Labs | Product development and solutions | |
AI | AI solutions and development | |
Dev | Developer tutorials and resources |


Comments