Search Results
Search this site
963 results found with an empty search
- Sentiment Analysis
Sentiment analysis is the process of extraction of emotions behind textual data. A sentiment analyzer is a widely adopted tool in most business sectors. Some of the common applications of sentiment analyzers are listed below: 1. Sentiment Analysis in Business for Competitive Advantage 2. Enhancing the Customer Experience through Sentiment Analysis in Business 3. Sentiment Analysis in Business for Brand Brisking. Sentiment Analysis is the most common text classification tool that analyses an incoming message and tells whether the underlying sentiment is positive, negative, or neutral. Environment Setup: The project is set up in Anaconda Environment on the jupyter notebook. Dependencies/Libraries Required: pandas sklearn pickle nltk matplotlib word cloud seaborn Table of Contents Dataset Exploration: The first step is the Dataset Exploration step which includes the process of loading a dataset and checking out its fields with a bit of visualization. Preparation and Feature Engineering: This step includes the removal of stopword and other basic preprocessing. In Feature Engineering raw dataset is transformed into vector formations that can be used by the machine learning model. Model Training: The final step is the Model Building step in which a machine learning model is trained on a labeled dataset. Evaluation of Text Classifier: The Classifier could be evaluated using different evaluation measures such as confusion matrix, F1-Score, Accuracy score, etc. Importing The Libraries: %matplotlib inline from sklearn import metrics import seaborn as sn import pandas as pd from sklearn.feature_extraction.text import CountVectorizer import pickle import nltk from sklearn.model_selection import train_test_split from sklearn.metrics import classification_report, f1_score,accuracy_score from wordcloud import WordCloud import matplotlib.pyplot as plt from sklearn import model_selection, preprocessing,svm In this step, we imported all the required libraries like seaborn, pandas(for preprocessing). nltk(For textual) etc. Data Exploration: Once the environment is set up and dependencies are installed it is time to get started and explore our data set. For this particular article, I have used a dataset consisting of more than 1000000 textual sentences along with their respective targets. The targets, in this case, are the sentiments which are positive and negative. So this becomes a binary classification problem. data = pd.read_csv(dataset,engine='python') data.head() In this above code file, we imported our dataset with moreover 1M of data. Here is how the dataset looks like In this dataset ItemID: Represents the Serial No. Sentiment: Represents whether the text sentiment is positive or negative. 0 shows negative sentiment whereas 1 shows positive sentiment. SentimentText: Represents the texts(For which we need to build our model to check further text sentiments). Wordcloud: In this Step, the word cloud has built on column SentimentText. all_words = ' '.join([text for text in data['SentimentText']]) wordcloud = WordCloud(width=800, height=500, random_state=21, max_font_size=110).generate(all_words) plt.figure(figsize=(10, 7)) plt.imshow(wordcloud, interpolation="bilinear") plt.axis('off') plt.show() In this section, the word cloud has made on column SentimentText. In the first step, all words are joined. Then a word cloud with height 800 and width 500, with font size 110 has been plotted. (With figure size of width 10 and height 7) the word cloud interpolation is bilinear. Data Preparation & Feature Engineering: This step, we need to remove stopwords, Punctuations, exclamation marks, convert uppercase to lowercase, etc. Punctuation, numbers, and special characters do not help much. It is better to remove them from the text. Let's Look at the rows. data_new = data.iloc[:3000] data_new.head() we can see some stopwords, ... , we need to remove those for building a good and better model. data.replace(r'\b\w{1,4}\b','', regex =True, inplace = True) all_words = ' '.join([text for text in data_new['SentimentText']]) wordcloud = WordCloud(width=800, height=500, random_state=21, max_font_size=110).generate(all_words) plt.figure(figsize=(10, 7)) plt.imshow(wordcloud, interpolation="bilinear") plt.axis('off') plt.show() So here we replace those entities from the data, and then join with all data. and we can see that this word cloud is more accurate than the previous one. Train test Split: The next part will be to convert it to a vectorize format and split the dataset into training and testing part. vectorizer = CountVectorizer() vectorizer.fit(data_new['SentimentText']) vec = vectorizer.transform(data_new['SentimentText']) data['encoded_text'] = vec Train_X, Test_X, Train_Y, Test_Y = model_selection.train_test_split(vec,data_new['Sentiment'],test_size=0.1) data.head() Let's check the shape of the training and testing data. Train_X.shape,Test_X.shape ((2700, 6681), (300, 6681)) Model Training: This involves the selection of algorithms and training models based on that algorithm. There are multiple algorithms that could perform this kind of stuff e.g Naive Bayes, SVM, Neural nets, and so on. SVM = svm.SVC(C=1.0, kernel='linear', degree=3, gamma='auto') SVM.fit(Train_X , Train_Y) predictions_SVM = SVM.predict(Test_X) here we have imported the Support vector machine model into it to train our model. Model Evaluation: The accuracy of 76.66 with an F1-score of 0.76 is achieved by SVM, which is not that bad we can tune this model and choose different features like POS, word embeddings, etc in place of cout vector formations in order to increase the accuracy and other evaluation measures of our model. print("SVM Accuracy Score -> ",accuracy_score(predictions_SVM,Test_Y)*100)print(classification_report(Test_Y,predictions_SVM))print(f1_score(Test_Y,predictions_SVM,average='weighted')) SVM Accuracy Score -> 76.33333333333333 precision recall f1-score support 0 0.84 0.85 0.84 225 1 0.53 0.51 0.52 75 accuracy 0.76 300 macro avg 0.68 0.68 0.68 300 weighted avg 0.76 0.76 0.76 300 0.7617020318061 Confusion Matrix: cm=metrics.confusion_matrix(Test_Y,predictions_SVM) plt.matshow(cm) plt.figure(figsize = (10,7)) ax= plt.subplot() ax.set_title('Confusion Matrix'); sn.heatmap(cm, annot=True,ax = ax) Here the heatmap of the confusion matrix is plotted. Let's see the confusion matrix cm array([[191, 34], [ 37, 38]]) So here we got 72 incorrect predictions and 228 incorrect predictions. Compare the True vs Predicted df = pd.DataFrame(Test_Y) df['pred'] = predictions_SVM sent = df['Sentiment'] pred = df['pred'] df.head() Let's analyze the positive and negative sentiments. plt.title('Sentiment distribution') cat = ['positive', 'negative'] freq = [len(negative),len(positive)] plt.ylabel('frequency') plt.bar(cat,freq,color= ['blue','green']) plt.show() So in this manner, we can build the sentiment analysis. For More Reference Check this GitHub Link: https://github.com/kapuskaFaizan/NLP-jupyter_notebook/blob/master/Sentiment_analysis.ipynb Thank You!
- Android 11 ( Features, Changes in Privacy,New Experiences And 5G Visual Indicators ) | CodersArts
Android 11 is upcoming 11th version of android initial release on 19 Feb 2020 and latest beta version release on 6 august 20 days ago. Beta is now available testing and development before official release coming. We are able to get his version on android studio emulator. We can try it on our pixel device and android emulator Features of Android 11 : Behavior Changes : System changes may effect our app when it running into our device android 11 Privacy Feature: New Safeguard to protect user privacy that you will support to protect in your app Top Privacy Changes : Scoped storage enforcement Apps that target Android 11 are always subject to scoped storage behaviors One Time Permission User grant temporary access to location, microphone, Camera throw one time permission Permissions auto-reset If users haven't interacted with an app for a few months on Android 11, the system auto-resets the app's sensitive permissions Background location access Android 11 changes how users can grant the background location permission to apps Background location access Android 11 changes how users can grant the background location permission to apps Foreground services Android 11 changes how foreground services can access location, camera, and microphone data Features and Apis : Android 11 introduces great new features and APIs for developers. New experiences 1. Device control : The Quick Access Device Controls feature, available starting in Android 11, allows the user to quickly view and control external devices such as lights, thermostats, and cameras from the Android power menu. Device aggregators (for example, Google Home) and third-party vendor apps can provide devices for display in this space. This guide shows you how to add support for device controls to your control app. Device Interface : Devices are displayed under Device controls as templated widgets. Five different device control widgets are available: 2. Media Controls 3. Screens 5G visual indicators: On Android 11 (API level 30) and higher, apps with android.Manifest.permission.READ_PHONE_STATE permission can request telephony display information updates through PhoneStateListener.onDisplayInfoChanged(). This includes radio access technology information for marketing and branding purposes. Various 5G icon display solutions for different carriers are provided by this new API. The supported technologies include the following: LTE LTE with carrier aggregation (LTE+) Advanced pro LTE (5Ge) NR (5G) NR on millimeter-wave cellular bands (5G+) Additional support for auth-per-use keys : KeyGenParameterSpec authPerOpKeyGenParameterSpec = new KeyGenParameterSpec.Builder("myKeystoreAlias", key-purpose) // Accept either a biometric credential or a device credential. // To accept only one type of credential, include only that type as the // 2nd argument. .setUserAuthenticationParameters(0 /* duration */, KeyProperties.AUTH_BIOMETRIC_STRONG | KeyProperties.AUTH_DEVICE_CREDENTIAL) .build(); Hire an android developer to get quick help for all your android app development needs. with the hands-on android assignment help and android project help by Codersarts android expert. You can contact the android programming help expert any time; we will help you overcome all the issues and find the right solution. Want to get help right now? Or Want to know price quote Please send your requirement files at contact@codersarts.com. and you'll get instant reply as soon as requirement receives
- Interface And Cloud Messaging in Android | CodersArts
Interface : i. In android interface is very useful concept with the interface we are able to access List of items in Recycler view adapter in simple word we can easily access multiple users like whatsapp we are able to send the message multiple users. ii. we are able to implement onClickListenr and onLongClick Listener into the same user with onclick listener we are able to go to the user location or another activity iii. with the on long Click listener we are able to perform another activity into the same account. iv, user is able to go to the location of his friend if he is lost v. Able to communicate multiple users at same time. Cloud Messaging : i. With the help of Retrofit api we are able to friend request to the another user ii. We are able to communicate with the users with this api and user is able to send to communicate with another user easily and able to send details over messaging platform. Code Interface : public interface ItemClickListener { void onClick(View view,int position); void onItemLongClick(View view,int position); } MyAdapeter.java public class MyAdapter extends RecyclerView.ViewHolder implements View.OnClickListener, View.OnLongClickListener { public TextView textEmail; ItemClickListener itemClickListener; public void setItemClickListener(ItemClickListener itemClickListener) { this.itemClickListener = itemClickListener; } public MyAdapter(@NonNull View itemView) { super(itemView); textEmail=itemView.findViewById(R.id.txt_email); itemView.setOnClickListener(this); } @Override public void onClick(View v) { itemClickListener.onClick(v,getAdapterPosition()); } @Override public boolean onLongClick(View v) { itemClickListener.onItemLongClick(v, getAdapterPosition()); return true; } } Mainn.java inside OnbindActivity holder.setItemClickListener(new ItemClickListener() { @Override public void onClick(View view, int position) { if(!model.getEmail().equals(FirebaseAuth.getInstance().getCurrentUser().getEmail())) { Toast.makeText(Online.this, "Lets Go", Toast.LENGTH_SHORT).show(); Intent map=new Intent(Online.this,MapsActivity.class); map.putExtra("email",model.getEmail()); map.putExtra("lat",mlocation.getLatitude()); map.putExtra("lng",mlocation.getLongitude()); startActivity(map); } } @Override public void onItemLongClick(View view, int position) { showDialogRequest(model); } }); Hire an android developer to get quick help for all your android app development needs. with the hands-on android assignment help and android project help by Codersarts android expert. You can contact the android programming help expert any time; we will help you overcome all the issues and find the right solution. Want to get help right now? Or Want to know price quote Please send your requirement files at contact@codersarts.com. and you'll get instant reply as soon as requirement receives
- MiniProject: Mining Accident Analysis In Machine Learning
Project Objective Employers are required to report any serious work-related injuries and death to the authority. This information helps employers, workers and the authority to evaluate the safety of a workplace, understand industry hazards, and implement worker protections to reduce and eliminate hazards. In this mini-project, assume you are engaged by a client to perform text mining on the accident reports to help find answers to the following questions: 1. What are the major types of accidents reflected in the reports? No labels, supervised or non-supervised? Clustering or Topic modelling? All data or partial data? 2. Which type of accidents are more common? Frequency of doc wrt topic 3. Can we find out the more risky occupations in such accidents? Information Extraction, how to identify “occupations” words? 4. Which part of the body is injured most? (Optional) Information Extraction, how to identify “body” words? The dataset is in file “osha.txt“. Data understanding and cleaning Load the data file into R. – read.delim(), header=FALSE e.g. textdata <- read.delim("osha.txt", header=FALSE, sep="\t", quote = "", stringsAsFactors = FALSE) Explore your data: - How many records do you have? How many variables? - Examine the first few records in the datasets. - What information does the dataset contain? - Which fields are useful for your study? - How long are the reports generally? - How’s the data quality? - What are the contents of the reports roughly? [ Create a word cloud for the dataset ] Vectorsource, corpus, DTM Term frequency summary Wordcloud Contact us: If you have any doubt in this blog or need any project or programming related help related to machine learning then you can contact at here
- Line Chart Using JAVAFX
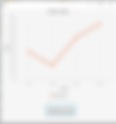
In this example we are seeing how to develop Line Chart application using technologies JavaFX. A line chart or line graph displays information as a series of data points (markers) connected by straight line segments. A Line Chart shows how the data changes at equal time frequency. In JavaFX, a line chart is represented by a class named LineChart. This class belongs to the package javafx.scene.chart. By instantiating this class, you can create a LineChart node in JavaFX. Line.fxml LineController.java package application; import javafx.event.ActionEvent; import javafx.fxml.FXML; import javafx.scene.chart.LineChart; import javafx.scene.chart.XYChart; public class LineController { @FXML LineChart lineChart; public void generateLineChart(ActionEvent ae){ lineChart.getData().clear(); XYChart.Series series=new XYChart.Series(); series.getData().add(new XYChart.Data("Jan",200)); series.getData().add(new XYChart.Data("Feb",100)); series.getData().add(new XYChart.Data("Mar",300)); series.getData().add(new XYChart.Data("Apr",400)); series.setName("Month Pay"); lineChart.getData().add(series); } } Main.java package application; import javafx.application.Application; import javafx.fxml.FXMLLoader; import javafx.stage.Stage; import javafx.scene.Parent; import javafx.scene.Scene; public class Main extends Application { @Override public void start(Stage primaryStage) { try { Parent root=FXMLLoader.load(getClass().getResource("/application/Line.fxml")); Scene scene = new Scene(root); scene.getStylesheets().add(getClass().getResource("application.css").toExternalForm()); primaryStage.setScene(scene); primaryStage.show(); } catch(Exception e) { e.printStackTrace(); } } public static void main(String[] args) { launch(args); } }
- Pie Chart Using JAVAFX
In this example we are seeing how to develop Pie Chart application using technologies JavaFX. A pie-chart is a representation of values as slices of a circle with different colors. These slices are labeled and the values corresponding to each slice is represented in the chart. In JavaFX, a pie chart is represented by a class named PieChart. This class belongs to the package javafx.scene.chart. This class has 5 properties which are as follows − clockwise − This is a Boolean Operator; on setting this operator true, the data slices in the pie charts will be arranged clockwise starting from the start angle of the pie chart. data − This represents an ObservableList object, which holds the data of the pie chart. labelLineLength − An integer operator representing the length of the lines connecting the labels and the slices of the pie chart. labelsVisible − This is a Boolean Operator; on setting this operator true, the labels for the pie charts will be drawn. By default, this operator is set to be true. startAngle − This is a double type operator, which represents the angle to start the first pie slice at. PieChart.fxml PieChartController.java package application; import javafx.collections.FXCollections; import javafx.collections.ObservableList; import javafx.event.ActionEvent; import javafx.fxml.FXML; import javafx.scene.chart.PieChart; import javafx.scene.chart.PieChart.Data; public class PieChartController { @FXML PieChart pieChart; public void generateChart(ActionEvent ae){ ObservableList list=FXCollections.observableArrayList( new PieChart.Data("Java",50), new PieChart.Data("C",30), new PieChart.Data("C++",25), new PieChart.Data("Python",40) ); pieChart.setData(list); } } Main.java package application; import javafx.application.Application; import javafx.fxml.FXMLLoader; import javafx.stage.Stage; import javafx.scene.Parent; import javafx.scene.Scene; import javafx.scene.layout.BorderPane; public class Main extends Application { @Override public void start(Stage primaryStage) { try { Parent root=FXMLLoader.load(getClass().getResource("/application/PieChart.fxml")); Scene scene = new Scene(root); scene.getStylesheets().add(getClass().getResource("application.css").toExternalForm()); primaryStage.setScene(scene); primaryStage.show(); } catch(Exception e) { e.printStackTrace(); } } public static void main(String[] args) { launch(args); } }
- NLP Techniques in Text Classification
(NLP) is a wide area of research where the worlds of artificial intelligence, computer science, and linguistics collide. It includes a bevy of interesting topics with cool real-world applications, like named entity recognition, machine translation, or machine question answering. Each of these topics has its own way of dealing with textual data. But before diving into the deep end and looking at these more complex applications, we need to wade in the shallow end and understand how simpler tasks such as text classification are performed. Text classification offers a good framework for getting familiar with textual data processing. There are many interesting applications for text classification such as spam detection and sentiment analysis. In this post, we will see some NLP techniques for text classification. The basics include: Structure extraction – identifying fields and blocks of content based on tagging Identify and mark sentence, phrase, and paragraph boundaries – these markers are important when doing entity extraction and NLP since they serve as useful breaks within which analysis occurs. Language identification – will detect the human language for the entire document and for each paragraph or sentence. Language detectors are critical to determining what linguistic algorithms and dictionaries to apply to the text. Tokenization – to divide up character streams into tokens which can be used for further processing and understanding. Tokens can be words, numbers, identifiers or punctuation (depending on the use case) Acronym normalization and tagging – acronyms can be specified as “I.B.M.” or “IBM” so these should be tagged and normalized. Lemmatization / Stemming – reduces word variations to simpler forms that may help increase the coverage of NLP utilities. Decompounding – for some languages (typically Germanic, Scandinavian, and Cyrillic languages), compound words will need to be split into smaller parts to allow for accurate NLP. Entity extraction – identifying and extracting entities (people, places, companies, etc.) is a necessary step to simplify downstream processing. There are several different methods: Regex extraction – good for phone numbers, ID numbers (e.g. SSN, driver’s licenses, etc.), e-mail addresses, numbers, URLs, hashtags, credit card numbers, and similar entities helps to identify the same. Dictionary extraction – uses a dictionary of token sequences and identifies when those sequences occur in the text. This is good for known entities, such as colors, units, sizes, employees, business groups, drug names, products, brands, and so on, which helps to identify the same. Complex pattern-based extraction – good for people names (made of known components), business names (made of known components), and context-based extraction scenarios (e.g. extract an item based on its context) which are fairly regular in nature and when high precision is preferred over high recall. Phrase extraction – extracts sequences of tokens (phrases) that have a strong meaning which is independent of the words when treated separately. These sequences should be treated as a single unit when doing NLP. For example, “Big Data” has a strong meaning which is independent of the words “big” and “data” when used separately. All companies have these sorts of phrases that are in common usage throughout the organization and are better treated as a unit rather than separately. Techniques to extract phrases include: Part of speech tagging – identifies phrases from the noun or verb clauses Statistical phrase extraction - identifies token sequences which occur more frequently than expected by chance Hybrid - uses both techniques together and tends to be the most accurate method. Some Text Classification Algorithms: 1. Naive Bayes Naive Bayes is a family of statistical algorithms we can make use of when doing text classification. One of the members of that family is Multinomial Naive Bayes (MNB). One of its main advantages is that you can get really good results when data available is not much (~ a couple of thousand tagged samples) and computational resources are scarce. All you need to know is that Naive Bayes is based on Bayes’s Theorem, which helps us compute the conditional probabilities of occurrence of two events based on the probabilities of occurrence of each individual event. This means that any vector that represents a text will have to contain information about the probabilities of the appearance of the words of the text within the texts of a given category so that the algorithm can compute the likelihood of that text’s belonging to the category. Support Vector Machines 2. Support Vectors Machines(SVMs): Support Vector Machines (SVM) is just one out of many algorithms we can choose from when doing text classification. Like naive Bayes, SVM doesn’t need much training data to start providing accurate results. Although it needs more computational resources than Naive Bayes, SVM can achieve more accurate results. In short, SVM takes care of drawing a “line” or hyperplane that divides a space into two subspaces: one subspace that contains vectors that belong to a group and another subspace that contains vectors that do not belong to that group. Those vectors are representations of your training texts and a group is a tag you have tagged your texts with. 3. Deep Learning: Deep learning is a set of algorithms and techniques inspired by how the human brain works. Text classification has benefited from the recent resurgence of deep learning architectures due to their potential to reach high accuracy with less need for engineered features. The two main deep learning architectures used in text classification are Convolutional Neural Networks (CNN) and Recurrent Neural Networks (RNN). On the one hand, deep learning algorithms require much more training data than traditional machine learning algorithms, i.e. at least millions of tagged examples. On the other hand, traditional machine learning algorithms such as SVM and NB reach a certain threshold where adding more training data doesn’t improve their accuracy. In contrast, deep learning classifiers continue to get better the more data you feed them with. Applications and Examples of Text Classification: Text classification can be used in a broad range of contexts such as classifying short texts (e.g. as tweets, headlines, or tweets) or organizing much larger documents (e.g. customer reviews, media articles, or legal contracts). Some of the most well-known examples of text classification include sentiment analysis, topic labeling, language detection, and intent detection. Sentiment Analysis: Probably the most common example of text classification is sentiment analysis: the automated process of determining whether a test is positive, negative, or neutral. Companies are using sentiment classifiers on a wide range of applications, such as product analytics, brand monitoring, customer support, market research, workforce analytics, and much more. This is a pre-trained classifier using MonkeyLearn for classifying text in English according to their sentiment. Feel free to experiment and try different expressions to see the classifier makes the predictions: Topic Labeling: Another common example of text classification is topic labeling, that is, understanding what a given text is talking about. It’s often used for structuring and organizing data such as organizing customer feedback by its topic or organizing news articles according to their subject. Language Detection: Language detection is another great example of text classification, that is, the process of classifying incoming text according to its language. The text classification also helps us to know the language of the text. Use-cases: Some real-life use cases are mentioned below. Social media monitoring checking. Brand monitoring checking. Customer service. Call Center service. Changing languages. Voice of the customer. Google Translate. Thank You! Reference: https://machinelearningmastery.com/best-practices-document-classification-deep-learning/
- Crud Operation using JavaFX
In this example we are seeing how to develop CRUD (Create, Read, Update and Delete) operation application using technologies JavaFX. In this example all operations are performed on Employee basic properties like employee id, employee name,department name,mobile number and employee salary . Application main aim is adding employee details to DB using user interface, and performing multiple operations like update, viewing and deleting. Employee.fxml EmployeeController.java package application; import java.io.IOException; import java.sql.Connection; import java.sql.PreparedStatement; import java.sql.ResultSet; import java.sql.SQLException; import javafx.collections.FXCollections; import javafx.collections.ObservableList; import javafx.event.ActionEvent; import javafx.fxml.FXML; import javafx.fxml.FXMLLoader; import javafx.scene.Parent; import javafx.scene.Scene; import javafx.scene.control.Label; import javafx.scene.control.TableColumn; import javafx.scene.control.TableView; import javafx.scene.control.TextField; import javafx.scene.control.cell.PropertyValueFactory; import javafx.stage.Stage; public class EmployeeController { @FXML private TextField ename; @FXML private TextField dept; @FXML private TextField mobNo; @FXML private TextField salary; @FXML private Label lavel; @FXML private TableView table; @FXML private TableColumn eid; @FXML private TableColumn name; @FXML private TableColumn department; @FXML private TableColumn salary1; @FXML private TableColumn mobile; @FXML private TextField id; Employee emp; Connection con=null; ResultSet rs=null; PreparedStatement pstmt=null; // create table employee ( id number,name varchar2(15),department varchar2(15),mobileNo varchar2(10),salary number); public void register(ActionEvent ae){ emp=new Employee(); emp.setName(ename.getText()); emp.setDepartment(dept.getText()); emp.setMobileNo(mobNo.getText()); emp.setSalary(Float.parseFloat(salary.getText())); if(emp.getMobileNo().length()<10 || emp.getMobileNo().length()>10){ lavel.setText("please enter correct mobile No"); return; } try { con=DBUtil.getConnection(); String sql="insert into employee values((select nvl(max(id),0)+1 from employee),?,?,?,?)"; pstmt=con.prepareStatement(sql); pstmt.setString(1,emp.getName()); pstmt.setString(2,emp.getDepartment()); pstmt.setString(3,emp.getMobileNo()); pstmt.setFloat(4, emp.getSalary()); rs=pstmt.executeQuery(); if(rs.next()){ lavel.setText("Register Sucessfully."); eid.setCellValueFactory(new PropertyValueFactory("eid")); name.setCellValueFactory(new PropertyValueFactory("name")); department.setCellValueFactory(new PropertyValueFactory("department")); salary1.setCellValueFactory(new PropertyValueFactory("salary1")); mobile.setCellValueFactory(new PropertyValueFactory("mobile")); ObservableList data = FXCollections.observableArrayList( new Employee(101,emp.getName(),emp.getDepartment(),123,"12312323") ); table.getItems().addAll(data); } } catch (SQLException e) { e.printStackTrace(); } System.out.println(emp.getSalary()+"..........."); } public void showAll(ActionEvent ae){ try { con =DBUtil.getConnection(); String sql="select * from employee"; pstmt=con.prepareStatement(sql); rs=pstmt.executeQuery(); while(rs.next()){ eid.setCellValueFactory(new PropertyValueFactory("eid")); name.setCellValueFactory(new PropertyValueFactory("name")); department.setCellValueFactory(new PropertyValueFactory("department")); salary1.setCellValueFactory(new PropertyValueFactory("salary1")); mobile.setCellValueFactory(new PropertyValueFactory("mobile")); ObservableList data = FXCollections.observableArrayList( new Employee(rs.getInt("id"),rs.getString("name"),rs.getString("department"),rs.getFloat("salary"),rs.getString("mobileNo")) ); table.getItems().addAll(data); } } catch (SQLException e) { e.printStackTrace(); } } public void deleteEmployee(ActionEvent ae){ try { con =DBUtil.getConnection(); String sql="delete from employee where id=?"; pstmt=con.prepareStatement(sql); pstmt.setInt(1, Integer.parseInt(id.getText())); rs=pstmt.executeQuery(); if(rs!=null){ lavel.setText("Record deleted "); }else{ lavel.setText("please check employee id"); } }catch(Exception e){ e.printStackTrace(); } } public void update(ActionEvent ae) throws IOException{ Stage primaryStage= new Stage(); Parent root =FXMLLoader.load(getClass().getResource("/application/Update.fxml")); // Parent root = FXMLLoader.load(getClass().getResource(arg0)) Scene scene = new Scene(root); scene.getStylesheets().add(getClass().getResource("application.css").toExternalForm()); primaryStage.setScene(scene); primaryStage.show(); } } Employee.java package application; public class Employee { private int eid; private String name; private String department; private float salary; private String mobileNo; public Employee() { super(); } public Employee(int eid, String name, String department, float salary, String mobileNo) { super(); this.eid = eid; this.name = name; this.department = department; this.salary = salary; this.mobileNo = mobileNo; } public int getEid() { return eid; } public void setEid(int eid) { this.eid = eid; } public String getName() { return name; } public void setName(String name) { this.name = name; } public String getDepartment() { return department; } public void setDepartment(String department) { this.department = department; } public float getSalary() { return salary; } public void setSalary(float salary) { this.salary = salary; } public String getMobileNo() { return mobileNo; } public void setMobileNo(String mobileNo) { this.mobileNo = mobileNo; } } Update.fxml UpdateController.java package application; import java.sql.Connection; import java.sql.PreparedStatement; import java.sql.ResultSet; import java.sql.SQLException; import javafx.collections.FXCollections; import javafx.collections.ObservableList; import javafx.event.ActionEvent; import javafx.fxml.FXML; import javafx.scene.control.Label; import javafx.scene.control.TableColumn; import javafx.scene.control.TableView; import javafx.scene.control.TextField; import javafx.scene.control.cell.PropertyValueFactory; public class UpdateController { @FXML private TextField ename; @FXML private TextField dept; @FXML private TextField mobNo; @FXML private TextField salary; @FXML private TextField id; @FXML private Label lavel; @FXML private TableView table; @FXML private TableColumn eid; @FXML private TableColumn name; @FXML private TableColumn department; @FXML private TableColumn salary1; @FXML private TableColumn mobile; Employee emp; Connection con=null; ResultSet rs=null; PreparedStatement pstmt=null; public void updateEmployee(ActionEvent ae){ emp=new Employee(); emp.setEid(Integer.parseInt(id.getText())); emp.setName(ename.getText()); emp.setDepartment(dept.getText()); emp.setMobileNo(mobNo.getText()); emp.setSalary(Float.parseFloat(salary.getText())); if(emp.getMobileNo().length()<10 || emp.getMobileNo().length()>10){ lavel.setText("please enter correct mobile No"); return; } try { con=DBUtil.getConnection(); String sql="update employee set name=?,department=?,mobileno=?,salary=? where id=?"; pstmt=con.prepareStatement(sql); pstmt.setString(1,emp.getName()); pstmt.setString(2,emp.getDepartment()); pstmt.setString(3,emp.getMobileNo()); pstmt.setFloat(4, emp.getSalary()); pstmt.setInt(5, emp.getEid()); rs=pstmt.executeQuery(); if(rs.next()){ lavel.setText("Update Sucessfully."); eid.setCellValueFactory(new PropertyValueFactory("eid")); name.setCellValueFactory(new PropertyValueFactory("name")); department.setCellValueFactory(new PropertyValueFactory("department")); salary1.setCellValueFactory(new PropertyValueFactory("salary1")); mobile.setCellValueFactory(new PropertyValueFactory("mobile")); ObservableList data = FXCollections.observableArrayList( new Employee(emp.getEid(),emp.getName(),emp.getDepartment(),emp.getSalary(),emp.getMobileNo()) ); table.getItems().addAll(data); } } catch (SQLException e) { e.printStackTrace(); } } } DBUtil.java package application; import java.sql.Connection; import java.sql.DriverManager; import java.sql.SQLException; public final class DBUtil { private static boolean isDriverLoaded = false; static{ try{ Class.forName("oracle.jdbc.driver.OracleDriver"); System.out.println("Driver Loaded"); isDriverLoaded = true; }catch(ClassNotFoundException e){ e.printStackTrace(); } } private final static String url="jdbc:oracle:thin:@localhost:1521:XE"; private final static String user="SYSTEM"; private final static String password="system"; public static Connection getConnection() throws SQLException{ Connection con = null; if(isDriverLoaded){ con = DriverManager.getConnection(url,user,password); System.out.println("Connection established"); } return con; } public static void closeConnection(Connection con) throws SQLException{ if(con!=null){ con.close(); System.out.println("connection closed"); } } } Main.java package application; import javafx.application.Application; import javafx.fxml.FXMLLoader; import javafx.stage.Stage; import javafx.scene.Parent; import javafx.scene.Scene; import javafx.scene.layout.BorderPane; public class Main extends Application { @Override public void start(Stage primaryStage) { try { Parent root = FXMLLoader.load(getClass().getResource("/application/Employee.fxml")); Scene scene = new Scene(root); scene.getStylesheets().add(getClass().getResource("application.css").toExternalForm()); primaryStage.setScene(scene); primaryStage.show(); } catch(Exception e) { e.printStackTrace(); } } public static void main(String[] args) { launch(args); } }
- Unicode And Binary Files Assignment Using Python
Note: In order to do this week's assignment, you will need to download this file, extract its contents, and use it as a base for your assignment. In other words the three folders - fonts, images, and text_files - must all be stored at the root level of your project folder. You will add any other folder you need to (e.g. docs) as you go along. For this assignment, you will need to submit a ZIP file containing all of the project files in this assignment that does the following: Opens up the XML file in the "text_files" folder Cleans out any non-ASCII characters from the file Saves the cleaned up file back to the file system under a new name Opens the cleaned up XML file For each employee in the XML file, adds name and title information to the file listed in the "profile_pic" field. All original images are stored in the "images" folder. All modified images must be stored under the "images/output_files/" folder The rest of your implementation details are up to your discretion (including font, color, size, positioning), applying the things you have learned about Python so far. Please note, however, that you must organize any classes\functions you create into modules and produce documentation (using Pydoc) for your work using the principles discussed earlier in the class. Your code must also be flexible so it could handle any XML and set of images thrown at it. Be sure to put comments in your code that clearly mark how you are performing your program logic. In the submission comments of this assignment, please place the repository URL of your file submission. Contact us at: contact@codersarts.com and get help related to python by our highly educated and experienced professionals
- System Programming And Automation
For this assignment, you are going to write a basic file management script to the following specifications: Your file manager needs to take command-line arguments. One of the arguments (-m) will be the mode the script needs to run in - basic, elevated, and admin. This argument is required; without it, the program should terminate. The other argument your program should take (-d) is optional and should be a directory path where you wish to browse files. If provided, your script will open that directory by default. If not, your script should open the default folder where it runs scripts. Your command-line arguments should be able to be accepted in any order. You need to ensure that no bad -m values get put in and that provided directory paths do not contain dot-dot folders. When your script loads, offer the user a menu of different things they can do. In basic mode, your script should allow the users to change the current directory to one of their choosing (you will need to prompt for this) and list items in the current directory only. When you list items, please include file size and distinguish between directories and files. In elevated mode, your script should allow users to do all of the above, plus be able to copy files and directories from one place to another (you will again need to prompt the user for details on how to accomplish this). In admin mode, your script should allow users to do all of the above, plus be able to move and delete files and directories (again, prompt the user for any details needed in order to make these operations work properly). Your script must log all commands to a file off the root of your working hard drive to a file called "system_log.txt" that's stored in a folder called "Python_Log". So, if you are working in Windows, your file would be stored at C:\Python_Log\system_log.txt You do not need to get overly granular here. If you are copying a file, just say "<name of the file> was copied to <destination>". If a directory was copied, just say "<name of the directory> was copied to <destination>". In the case where a directory is copied, you don't need to list the individual files that were copied...just the name of the folder. For any delete operation, you need to first copy whatever you're deleting to a folder off the root of your working hard drive to a folder called "backups". Then, once you've copied everything over, rename each file\directory so that the names are prefixed by "deleted_". Thus a file named "file.txt" would be renamed to "deleted_file.txt". Details on the above instructions are as follows: Your program must include appropriate error checking to make sure the source and destination folders do/don't exist as appropriate, as well as handle any other potential errors. If the destination folder doesn't exist when performing an operation, your program must block the operation and ask the user to try again. Your script must be designed to work equally well on Windows, Mac, and Linux platforms. The rest of your implementation details are up to your discretion, applying the things you have learned about Python so far. Please note, however, that you must organize any classes\functions you create into modules and produce documentation (using Pydoc) for your work using the principles discussed earlier in the class. You do not need to create test cases. Be sure to put comments in your code that clearly mark how you are performing your program logic. In the submission comments of this assignment, please place the repository URL of your file submission. contact us: contact@codersarts.com to get any system programming assignemnt help related to python, java or Operating System.
- Creating Help Desk Personal Using Python Tkinter
GUI Programming Assignment For this assignment, you will need to submit a ZIP file containing all of the project files for this assignment. Functional requirements for this assignment are as follows: The project you are going to build is intended to be used by helpdesk personnel for configuring a server-side application that pulls its settings in from a JSON file (your JSON file will look just like a Python dictionary). The items the app needs to control are as follows: -Max threads (allow to choose 1, 2, or 4 only) -Event log file location -Types of events to log (can choose application, security, error, input/output - these are not mutually exclusive) -Supported file types (can choose .doc, .docx, .ppt, .pptx, .xls, .xslx, .rtf, .pdf, .txt, .jpg, .png, .gif, .xml, .html, .zip, .mp4, .mov - these are not mutually exclusive) -Whether or not to turn debug mode on -Server port (single value in the range from 50,000 to 50,500) Your program must have the ability to save a user's settings to a properly formatted JSON file (you are going to need to create a format for this that works for you). Your program must have the ability to load a JSON file from the filesystem. When it does, it should pre-set all of the form fields on your application to the values that are in the file you loaded. Your program must use either buttons or a menu system to achieve saving/loading functionality. If you use buttons, make sure that they use images on them. Use the appropriate dialog widgets for opening files and saving back to the file system. You should make every effort to ensure your application is fault-tolerant and free from software bugs. The rest of your implementation details are up to your discretion (including font, color, size, positioning, which widgets to use, etc.), applying the things you have learned about Python so far. Please note, however, that you must organize any classes\functions you create into modules and produce documentation (using Pydoc) for your work using the principles discussed earlier in the class. Be sure to put comments in your code that clearly mark how you are performing your program logic. In the submission comments of this assignment, please place the repository URL of your file submission. Contact us: contact@codersarts.com to get instant help.
- Lost And Found App | Coders Arts
This App is Design for real time location tracking for for two user this shows the real time location of both users, We have Implemented firebase Recycler Adapter of and to get both the users details on to the CradView and design a menu bar onto the top of corner and there is we have created two activity meet and logout when we click on meet, we can add user and send them request for for Accept and decline if user accept the request then map show the path of user if user decline the request we are not able to follow the path of user. that is basic map and there is my live location shows and above searchbar is given where you can search the second user details splash Activity : Below when you open the app the splash activity shows you for 3 second Live Location of Users : Their is Splash Activity where first splash message show for 3 second and after that main activity open for sign Up there is an option you have Sign Up with Email,Google and Facebook you can signIn with any of them. after that their is Crad View were we have get the details of users. Sign Up : Menu : Hire an android developer to get quick help for all your android app development needs. with the hands-on android assignment help and android project help by Codersarts android expert. You can contact the android programming help expert any time; we will help you overcome all the issues and find the right solution. Want to get help right now? Or Want to know price quote Please send your requirement files at contact@codersarts.com. and you'll get instant reply as soon as requirement receives